
궤도
[백엔드] Node.js + Sequelize + MySQL로 암호화된 회원가입-로그인 API 만들기(feat. crypto) 본문
[백엔드] Node.js + Sequelize + MySQL로 암호화된 회원가입-로그인 API 만들기(feat. crypto)
영이오 2021. 2. 3. 15:15지난 게시글들을 통해 CRUD를 구현했다. 이제 회원가입-로그인 기능을 구현할 차례이다.
근데 회원정보를 저장할 때 비밀번호를 그대로 DB에 넣으면 보안으로 까이기 딱 좋다. 사실 우리 프로젝트에선 별로 까이지 않겠지만 그래도 대충이라도 넣어주자. 암호화에는 crypto를 사용할 것이다.
[Node.js] 회원가입&로그인(1) - 회원 가입 + 비밀번호 암호화 ( crypto 모듈 )
2019. 07. 21 수정 이번 글에서는 sequelize를 이용하여 회원 가입 기능을 구현해보고, crypto 모듈을 이용하여 비밀번호를 암호화하는 방법에 대해서 알아보도록 하겠습니다. 개발환경 express-generator 4.
victorydntmd.tistory.com
이 블로그를 참고했다.
[백엔드] Node.js에서 sequelize를 활용하여 CRUD 구현하기(RESTful API)[2]
지난 시간엔 sequelize를 활용하여 CRUD를 구현하고 이걸 웹으로 확인해 보았다. 이제 이걸 프론트가 사용할 수 있도록 API로 만들어보자~ 아 맞아 그리고 지금까진 실행할 때 npm start로 했는데 앞으
myunji.tistory.com
지난 게시글의 코드를 수정한 것이기 때문에 해당 게시글과 같이 보는 것이 좋을 것이다.
Register
var models = require('../models');
var crypto = require('crypto'); //추가됐음
const express = require('express');
const router = express.Router();

//Register
router.post('/', async function (req, res, next) {
  let body = req.body;

  if (!body.stu_id) {
    res.status(400).send({
      message: "Content can not be empty!"
    });
    return;
  }

  let exUser = await models.student.findOne({
    where: {
      stu_id: body.stu_id
    }
  })
  if(exUser){
    res.status(500).send({
      message: "duplicate id!"
    });
    return;
  }

  let inputPassword = body.stu_pw;
  let salt = Math.round((new Date().valueOf() * Math.random())) + "";
  let hashPassword = crypto.createHash("sha512").update(inputPassword + salt).digest("hex");

  const userInfo = {
    stu_id: body.stu_id,
    stu_pw: hashPassword,
    stu_nick: body.stu_nick,
    stu_grade: body.stu_grade,
    stu_photo: body.stu_photo,
    salt: salt
  }

  models.student.create(userInfo)
    .then(result => {
      res.status(200).send(result);
    })
    .catch(err => {
      res.status(500).send({
        message:
          err.message || "Some error occurred while creating the Tutorial."
      });
    });
});
지난 게시글의 create 부분을 이렇게 수정했다.
var crypto를 추가했는데, crypto는 내장 모듈이라 install 할 필요가 없다. 회원가입시 중요한 것은 2가지이다.
1. 아이디가 중복이 아닌지 확인
2. 비밀번호 암호화해서 db에 저장
  let exUser = await models.student.findOne({
    where: {
      stu_id: body.stu_id
    }
  })
  if(exUser){
    res.status(500).send({
      message: "duplicate id!"
    });
    return;
  }
여기에서 아이디 중복여부를 체크한다. await를 쓰기 위해 함수를 async로 수정했다.
  let inputPassword = body.stu_pw;
  let salt = Math.round((new Date().valueOf() * Math.random())) + "";
  let hashPassword = crypto.createHash("sha512").update(inputPassword + salt).digest("hex");

  const userInfo = {
    stu_id: body.stu_id,
    stu_pw: hashPassword,
    stu_nick: body.stu_nick,
    stu_grade: body.stu_grade,
    stu_photo: body.stu_photo,
    salt: salt
  }
비밀번호를 암호화 해서 저장하는 과정이다. 유저 정보가 저장된 student 테이블에 salt 칼럼을 추가했다. 이게 없으면 암호화된 비밀번호를 풀 수 없다.
Postman으로 확인해보자

이미 존재하는 test라는 id를 사용하려고 하면 이렇게 duplicate id 라는 것을 알려준다.

없는 id는 잘 들어오는 것을 볼 수 있고, 비밀번호도 입력값과 다르게 암호화돼서 들어오는 것을 볼 수 있다.
Login
일단 시작하기 전에 routes 폴더에 user.login.js 파일을 추가한다.
그리고 app.js 파일에
var register = require("./routes/user.register");
var login = require("./routes/user.login"); //추가
app.use('/api/user/register', register);
app.use('/api/user/login', login); //추가
login을 추가해주자. 왜인지는 지난 게시글에 써있다.
routes/user.login.js
var models = require('../models');
var crypto = require('crypto');
const express = require('express');
const router = express.Router();
var Op = models.Sequelize.Op;

//Login
router.post('/', async function (req, res, next) {
    let body = req.body;

    if(!body.stu_id){
        res.status(500).send({
            message: "student id is null"
        });
        return;
    }

    let result = await models.student.findOne({
        where: {
            stu_id: body.stu_id
        }
    });

    let dbPassword = result.dataValues.stu_pw;
    let inputPassword = body.stu_pw;
    let salt = result.dataValues.salt;
    let hashPassword = crypto.createHash("sha512").update(inputPassword + salt).digest("hex");

    if (dbPassword === hashPassword) {
        res.send({
            message: "Login success",
            status:'success',
            data:{
                stu_id:body.stu_id
            }
        });
    }
    else {
        res.status(500).send({
            message: "Wrong Password"
        });
    }
})

module.exports = router;
dbPassword는 db에 저장된 비밀번호이고, inputPassword는 사용자가 입력한 비밀번호이다.
inputPassword를 salt를 사용하여 hashPassword로 바꿔준 뒤, 이 값이 dbPassword와 일치하는 지 확인한다.
localhost3001:/api/user/login으로 들어가서 확인해보자
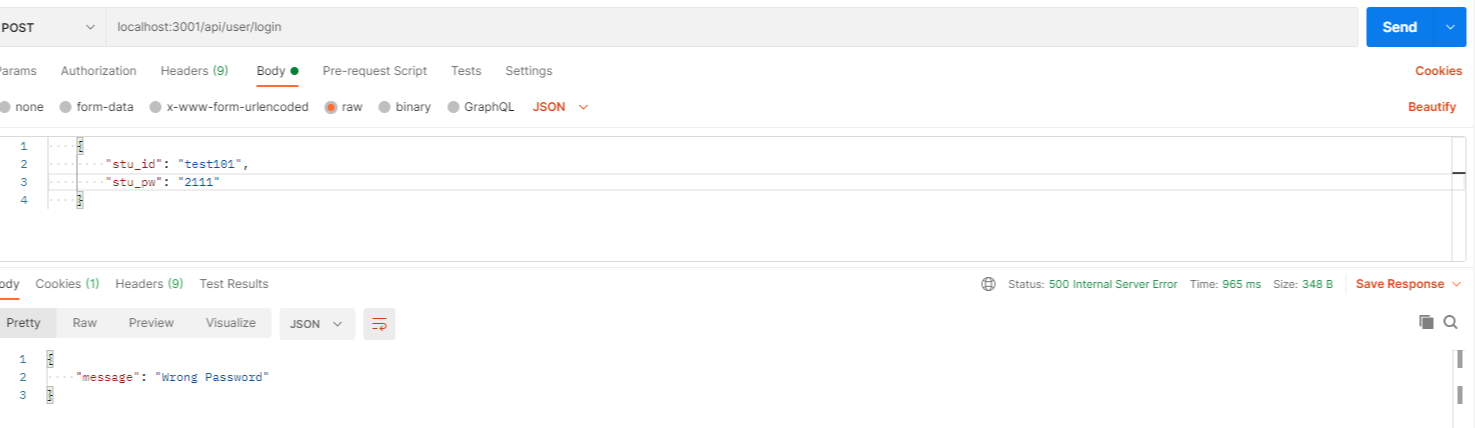
틀린 비밀번호를 입력하면 Wrong Password를 출력하고
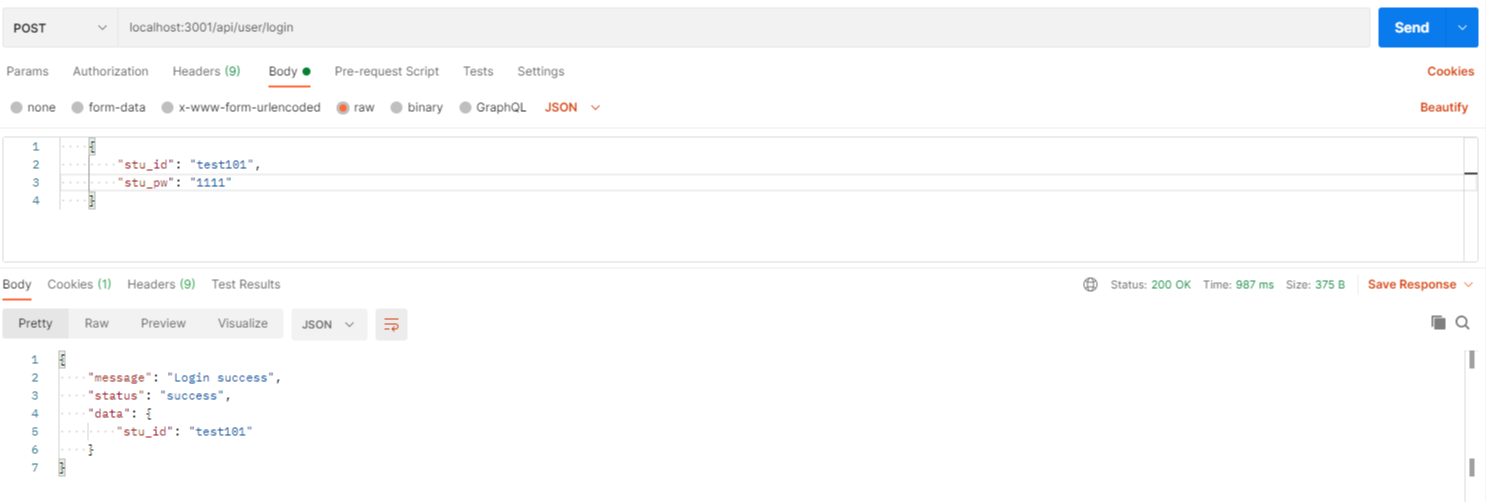
옳은 비밀번호를 입력하면 Success를 출력한다.


